Introduction
If you’ve recently purchased an ankle brace with straps, congratulations—you’ve made a smart investment in your comfort and joint health. But now you’re staring at the criss-crossed Velcro and wondering, how do I actually put this thing on?
You’re not alone. Figuring out how to wear a figure-8 ankle brace or a double strap brace can be a bit confusing at first. In this practical guide, we’ll show you step-by-step how to put it on properly—and how to make the most out of your new support system.
1. Why Fit Matters
A brace that’s too loose won’t provide support. Too tight, and it could restrict blood flow. Getting it just right is essential to:
-
Protect the joint
-
Reduce swelling
-
Improve range of motion
-
Prevent chafing or discomfort
That’s why strap-based models are so popular—they’re fully adjustable.
2. Step-by-Step Guide: How to Put on an Ankle Brace with Straps
Here’s a standard method for a figure-8 or double-strap brace:
Step 1: Start with Clean, Dry Skin
Wear thin ankle socks if you’re prone to irritation. Make sure the brace is clean and not twisted.
Step 2: Slide Your Foot into the Brace Sleeve
Some braces have a basic slip-on design or a lace-up component. Make sure your heel is aligned in the cut-out area.
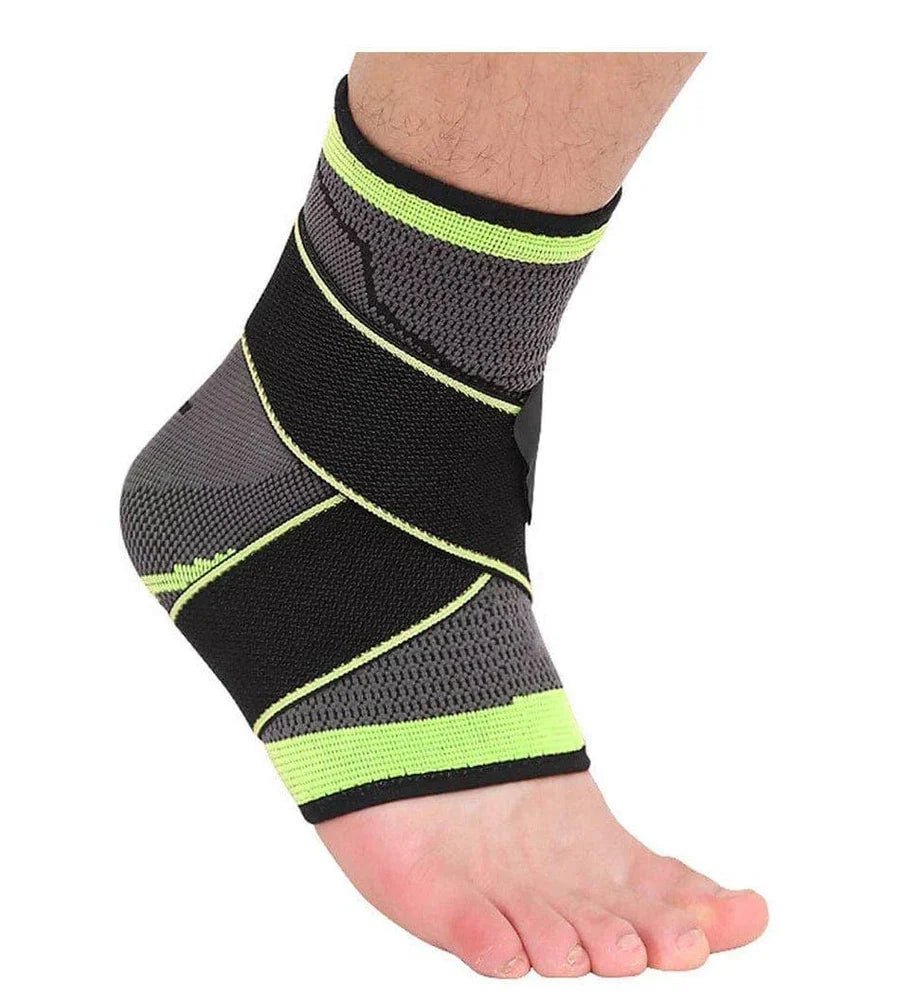
Step 3: Cross the Straps Over the Top of Your Foot
Wrap one strap across the top of your foot diagonally toward the outside. Then take the second strap across in the opposite direction.
Step 4: Wrap Around the Bottom of Your Arch
Bring each strap under the foot and around your heel—this forms the figure-8 loop that locks in stability.
Step 5: Secure on the Sides or Behind the Ankle
Fasten the Velcro on each side or behind your leg depending on the brace design. Check for symmetry and comfort.
3. How Tight Should It Be?
The brace should feel:
-
Snug enough to prevent rolling
-
Loose enough to allow foot movement and circulation
-
Comfortable inside your shoe (test before heading out)
If your foot turns red or numb, it’s too tight. If your ankle still wobbles, it’s too loose.
4. Tips for Daily Use
-
Practice First: Put it on several times at home before using it in a workout or on the go.
-
Pair With the Right Shoes: Use sneakers or trainers with wide openings.
-
Wash Weekly: Hand wash with mild soap to keep Velcro sticky and brace odor-free.
5. Popular Styles and What Makes Them Different
-
McDavid light ankle brace with figure-8 strap: Great for sports—lightweight and breathable.
-
Double strap ankle brace: Excellent for lifting or long walks—adds targeted stability.
-
Laced + strap braces: Maximum support for serious sprains or intense physical activity.
6. What to Avoid
❌ Don’t use it on broken skin
❌ Don’t overtighten for long periods
❌ Don’t wear it to bed unless recommended by a medical professional
❌ Don’t forget to alternate your footwear to allow brace air drying
7. Troubleshooting Common Fit Issues
Problem: “It feels bulky in my shoe.”
→ Try thinner socks or adjust strap angles for a flatter profile.
Problem: “My brace slips down.”
→ Make sure it's aligned properly and not over loose pants. Retighten mid-day if needed.
Problem: “Still feeling pain.”
→ Pair with light stretching, rest, or talk to a physiotherapist. The brace supports—but doesn’t heal—injuries alone.
Final Thoughts
Using a strap-based ankle brace doesn’t have to be complicated. Once you master the fit, you’ll enjoy increased stability, confidence, and comfort with every step.
Skip the confusion and start walking smarter. Grab our easy-to-use ankle strap brace today and feel the difference from the first wear.